Ramblings

Experimenting On Claybord With Watercolour and Pencil
I’m in my favourite place - my studio - messing around with Ampersand Claybord. What fun!
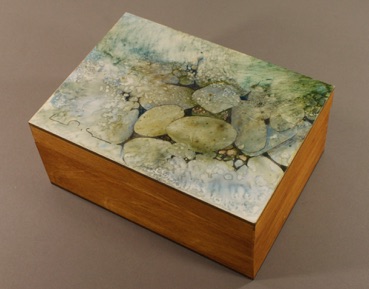
This versatile product comes as panels (both flat and raised) in a variety of sizes. It is also available in box kits such as the 5” x 7” one I used for the jewel-box shown above. I’ve spent the past few days exploring how this slick surface reacts to watercolour, pencil and water-soluble coloured pencils. The following links will take you to the Claybord information on the Ampersand site:
waterhttp://www.ampersandart.com/claybord.html
http://www.ampersandart.com/cbord-box-kits.html
The Method Behind My Madness
Building an Underpaintng
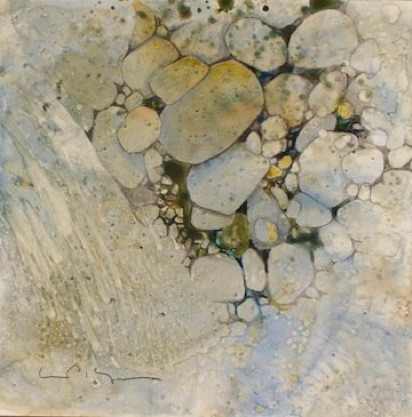
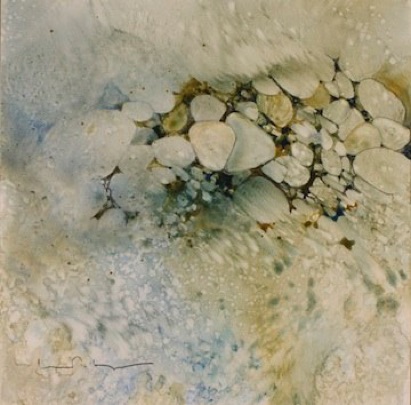
The three small watercolours of pebbles shown in this post began by saturating the brilliant white Claybord surface with water.
Cobalt Blue, Raw Umber and Raw Sienna were applied with broad strokes using a flat 1” wash brush. I enjoyed watching the paint slide around on the semi-absorbent ground and develop textures as the water quickly evaporated. Splatters of paint and droplets of water were teased with a soft brush to encourage traces of the white surface to shimmer through.
I set the work aside to dry before I began to develop the design by sketching in the uppermost layer of round pebbles with a graphite pencil.
Raw Sienna and Cerulean Blue were washed around the pebbles with a super-soft brush to minimize the lifting of the underpainting.
Additional layers of pebbles were added with pencil and glazes of colour. Because I work in the “negative” the piece evolves from near to far . Each new shape was positioned and arranged to enhance and balance the overall design.
As the negative spaces between the shapes begin to fill with new pebbles, the value was reduced ( working from light to dark) to create depth and drama. Cobalt Blue and Raw Umber as well as graphite pencil provided the deeper values and tie the pebble shapes to the underpainting. Extra shading was added with watercolour pencils in the same hues.
When complete I applied a light spray of Luscaux Workable Fixative. It is completely clear and does not alter the soft lustre of the work.
Observations
The ultra-smooth Claybord surface is surprisingly resilient and will take plenty of abuse! I discovered that a line can be removed with a soft eraser, while colour can be lifted with a damp brush. A tissue or a wet finger will do the trick too!
Because Claybord is so slick it is a little tricky to apply glazes. Use a soft brush with care or the colour will immediately lift back to the white surface. I recommend a squirrel hair brush for this job. Try your favourite sizes from the following series: Jet Brush - http://www.black-horse.com/Products/Products.php?subcategoryID=91
If you have worked with YUPO you will find some similarities. Clayboard is more absorbent allowing some colour penetration.and when dry it does stabilize. to perform along the lines of a highly polished Gessoed board.
To protect the finished watercolour spray lightly with Golden Acrylic Varnish or Luscaux Workable fix. My choice is a mot or satin gloss.
Now it’s your turn!
Claybord is a great alternative surface to explore working with acrylics, watercolour and pencil. It’s reassuring to know that experiments that go wrong can usually be removed with a bit of water, sandpaper or oil-free steel wool.
I’d love to see your masterpieces so email me an digital image at studio@lindakemp.com Please reduce the size down to a small jpg at 72dpi. Let me know if you would like to receive my comments or suggestions in a reply.
Happy painting!
Linda
To subscribe to this blog:
Please include “Subscribe” in the subject line
Friday, January 20, 2012