Textures with Acrylic and Water Spray Bottle

Q & A Textures with Acrylic and Water from a Spray Bottle
Monday, May 16, 2016


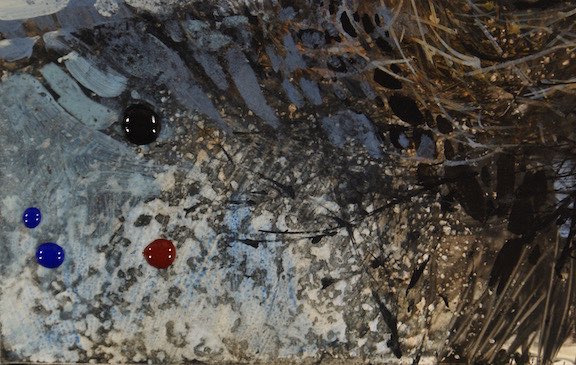
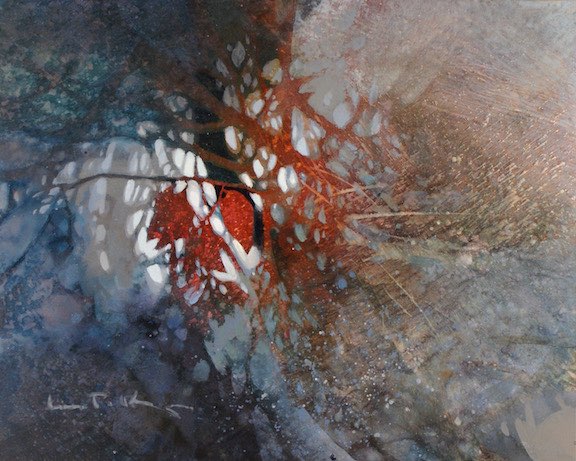
Q How do you make the mottled texture in your acrylic paintings like the one above?
Adding texture helps to animate and activate the surface. There are lots of tools and methods for building texture with acrylic but this is one I use frequently. The secret is timing and control over the size of water droplets! Let me show you!
What supplies do I need?
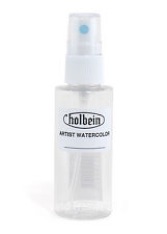
Acrylic paint, a spray bottle filled with water, untextured paper towel, a soft dry brush. this technique will work on most painting surfaces - canvas, mylar and claybord are my favourite. The crucial tool is a sprayer that emits small droplets of water - not a fine mist or large splatters. You may need to test several sprayers before you get one that is perfect. I use HK Holbein’s Water Bottle that looks like this...
Show me how!
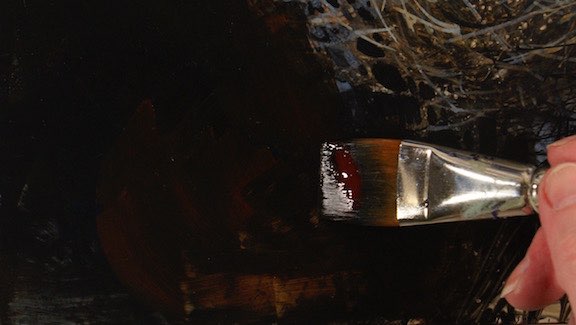
Apply a few drops of fluid acrylic on a dry painting. Light transparent colour will allow the underpainting to show through while opaques and dark transparent paints give more coverage. Since I am using deep darks here the light in this corner will dramatically drop to a lower value. Use any hue or value that will work with your design and colour concept.
Brush the paint over the area where you wish to create the texture. You don’t need a lot of paint - the layer should be thin. Clean your brush with a paper towel to remove excess if the application is too heavy.
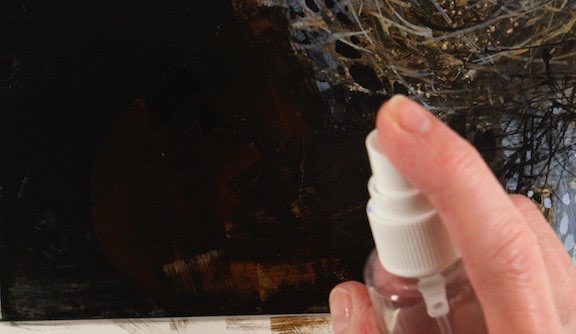
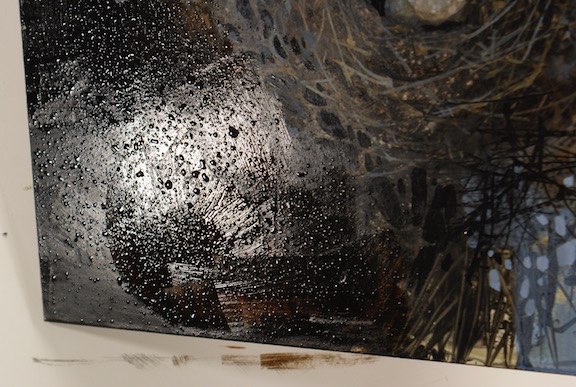
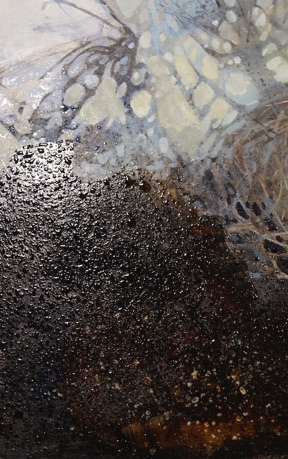
As the paint becomes tacky, spritz with water. Be sure to test your sprayer first. It is crucial to create droplets of just the right size. If your sprayer produces a fine mist of tiny water particles the result will be a big solid light hole in your color. Too large and you will have big splotches and unattractive marks.
These water drops are exactly what you are trying to achieve! I’ve tilted my board so the light strikes it to show you just what I mean.
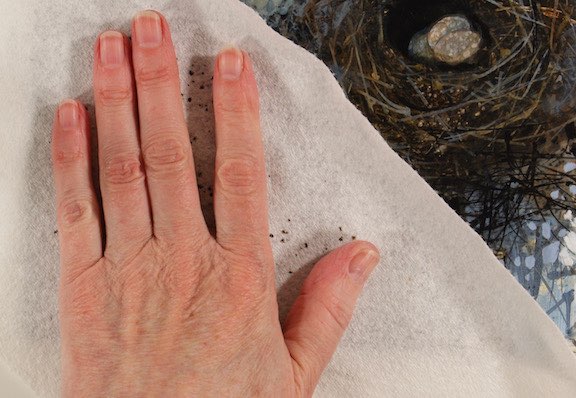
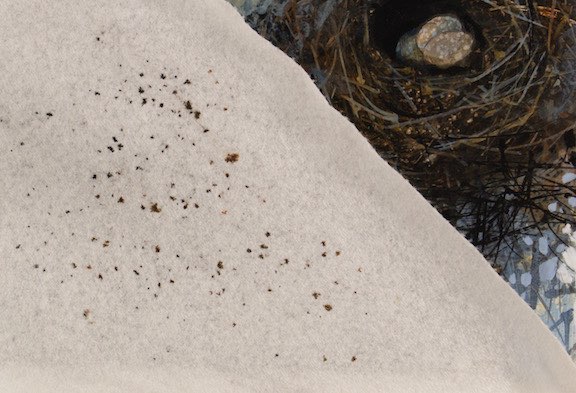
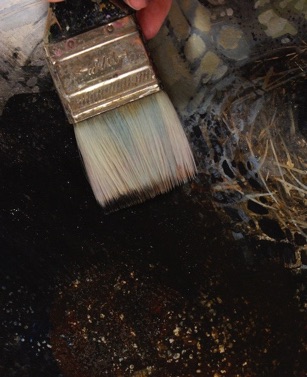
Allow the water to sit for just a few moments. Lay untextured paper towel over the area and lightly smooth.
You can see the bits of wet paint soaking trough the towel. Remove the paper and assess the textures you have made. If you want to add another layer dry the painting and start again. Each new application enriches the surface - previous colours will show through.
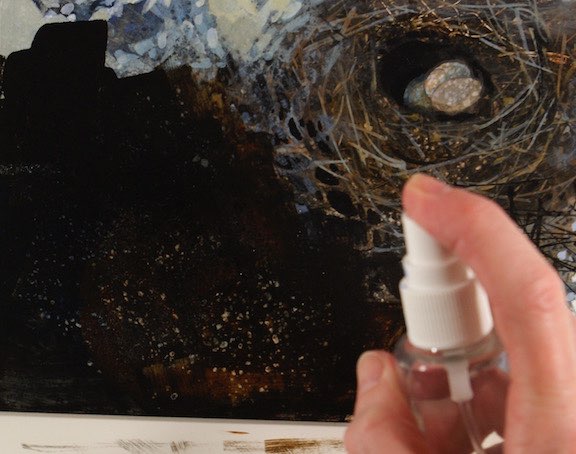
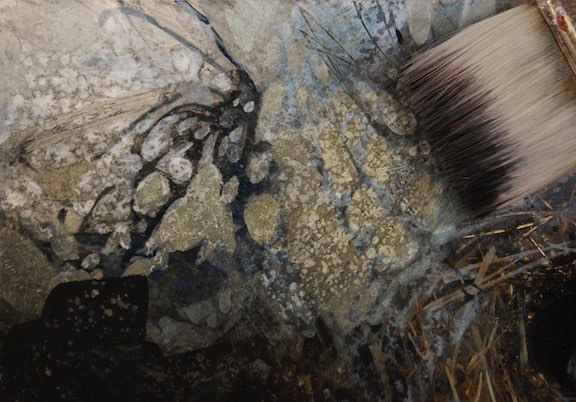
If you want to soften the texture here’s what to do while the paint is still tacky....
Spritz again! The paint must not be throughly dry if you are to see any results this time. (You can see the surface textures that remain from the last step.)
Tilt the board to encourage the colour to move or use a soft DRY brush to drag through the paint. The surface will be wet allowing you to achieve some gradation and soften edges. If the paint does not budge use a stiffer brush but work with care.
Once the colour has dried it will not spread. If the desired effect has not been achieved dry the painting and add more layers following the same procedure.
I pulled the dark thin watery colour over the lighter area and then sprayed again. As the water sat it began to push away colour - mush like making backruns with watercolour. I quick swish with a dry brush accentuated the marks.
I think it is amazing that just a sprinkling of water when used with acrylic paints can establish such an interesting surface quality.
Happy painting!
Linda