Linda Kemp - Negative Painting Demonstration
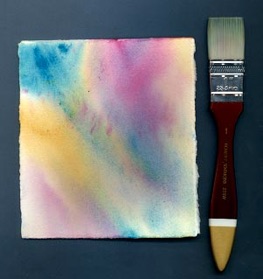
Step 1
Apply wet into wet base colour to your paper
Thoroughly wet the surface of your paper with a 1" flat brush and water. The paper should appear shiny. Apply brush loads of each colour separately allowing them to mix on the wet paper. Spatter, drip and pour! Lift and tilt the paper to encourage the pigments to flow and mingle. Leave as little or as much white as you wish. Don't fuss over the wash for too long; this is just to get you started. When you are pleased with this first application of colour set the painting on a board to dry completely.
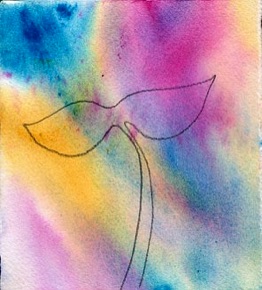
Step 2
Draw leaf shape and a stem
Loosely sketch leaves onto the dry paper with a pencil. Follow my example, or create your own personal symbol. While it may be tempting to want more intricate, complex forms, keep your shapes very simple and flat for this exercise.
Step 3
Paint around your shape
Load a round brush with well diluted Raw Sienna. Now, instead of filling in the shape with colour, paint around it! You'll be working in the negative space. Begin at the edge of the leaves and drag the colour out towards the outside edge of your paper, thinning with water as you go. Work quickly and continue to glaze all around the shape. Dry your painting completely before you move on to the next step.
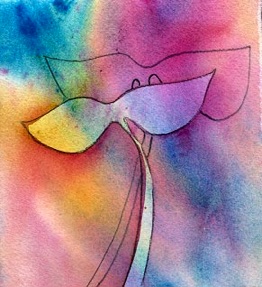
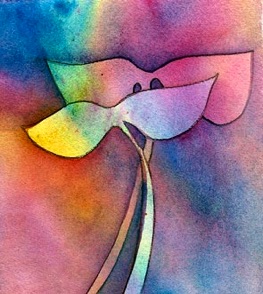
Step 4
Now here's the trick of building layers in the negative...
A new set of leaves is added by tucking it under the first form. It will be partially hidden. Take care while adding the stem to ensure that it lines up visually when passing under the previous stem and out the other side.
Step 5
Glaze around the shapes
Paint around your leaf shapes with diluted Rose Violet and Cobalt Blue. As the layers build, darken the value a step or two to bring the lighter layers of leaves forward. Don't worry if backruns appear. You will be able to cover them with subsequent layers. Dry your painting completely.
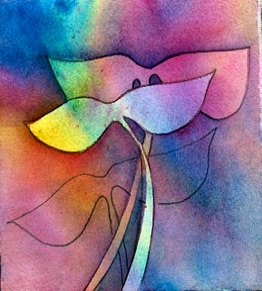
Step 6
Add a third set of leaves
Pencil in a new set of leaves. Once again this new shape is to be tucked under the upper layers of foliage.
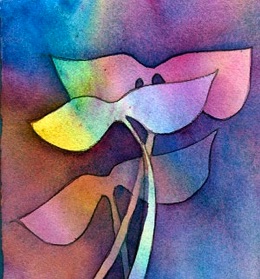
Step 7
Continue to build layers
Glaze around a new layer of leaves with Rose Violet. Drop diluted Cobalt Blue into the wet paint for variety.
Pull the colour away from the shapes and out to the edge of the paper. Be sure to fill in the captured negatives between the stems.
Once again dry the painting.
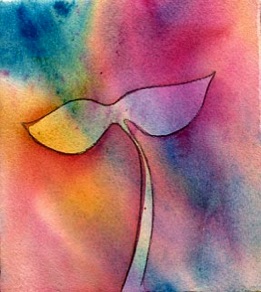
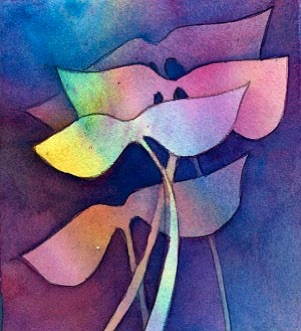
Step 8
How many layers can you build?
I've created four layers, but you don't need to stop here! Notice that in this sample the layers build from light to dark and from front to back. Cobalt Blue and Rose Violet used in this final glaze are of a heavier consistency than earlier applications.
Try It! Negative painting is FUN! Discover just how easy and fun negative painting is, try this sample project....for a complete course in negative painting you will want to follow along with the exercises in Linda’s book Watercolour Painting Outside the Lines
Supplies
Along with your regular watercolour supplies, this project requires:
Paper: 5" x 7" Good quality watercolour paper such as Arches 140 CP or Saunders Waterford 200 CP
Paint: Three tubes of Artist's quality watercolour - my choices for this exercises are Holbein Cobalt Blue, Rose Violet and Raw Sienna
Brushes: #8 or 10 round that comes to a good point and a 1" flat wash brush
Extras: A pencil and a hand held hair dryer


Tips for successful negative painting
* Dry between layers.
* Remember that you are not painting leaves, you are painting the spaces around them.
* Resist the temptation of going back inside the forms to add details such as veins or to adjust the colour; that is Positive Painting!
-
*Now create your own shapes to make personal symbols. Keep the shapes simple and flat for the best results.
All digital images of artwork on this website (www.lindakemp.com) are the sole property and creation of Linda Kemp and are legally protected by Canadian and International Copyright Laws and may not be copied or used for reproduction in ANY manner without expressed written authorization from Linda Kemp.
Any unauthorized use of the images herein constitutes copyright infringement.